How to Create a New Application On Cameralyze Platform?

How to Create a New Application On Cameralyze Platform?
Following this article's steps, you can easily create your application from the Cameralyze No-Code Visual Intelligence Platform with the drag-and-drop method.
You can watch the demo video below to guide you, or you can continue reading this article;
1. Sign Up or Log In. (You can quickly Sign Up with Google)
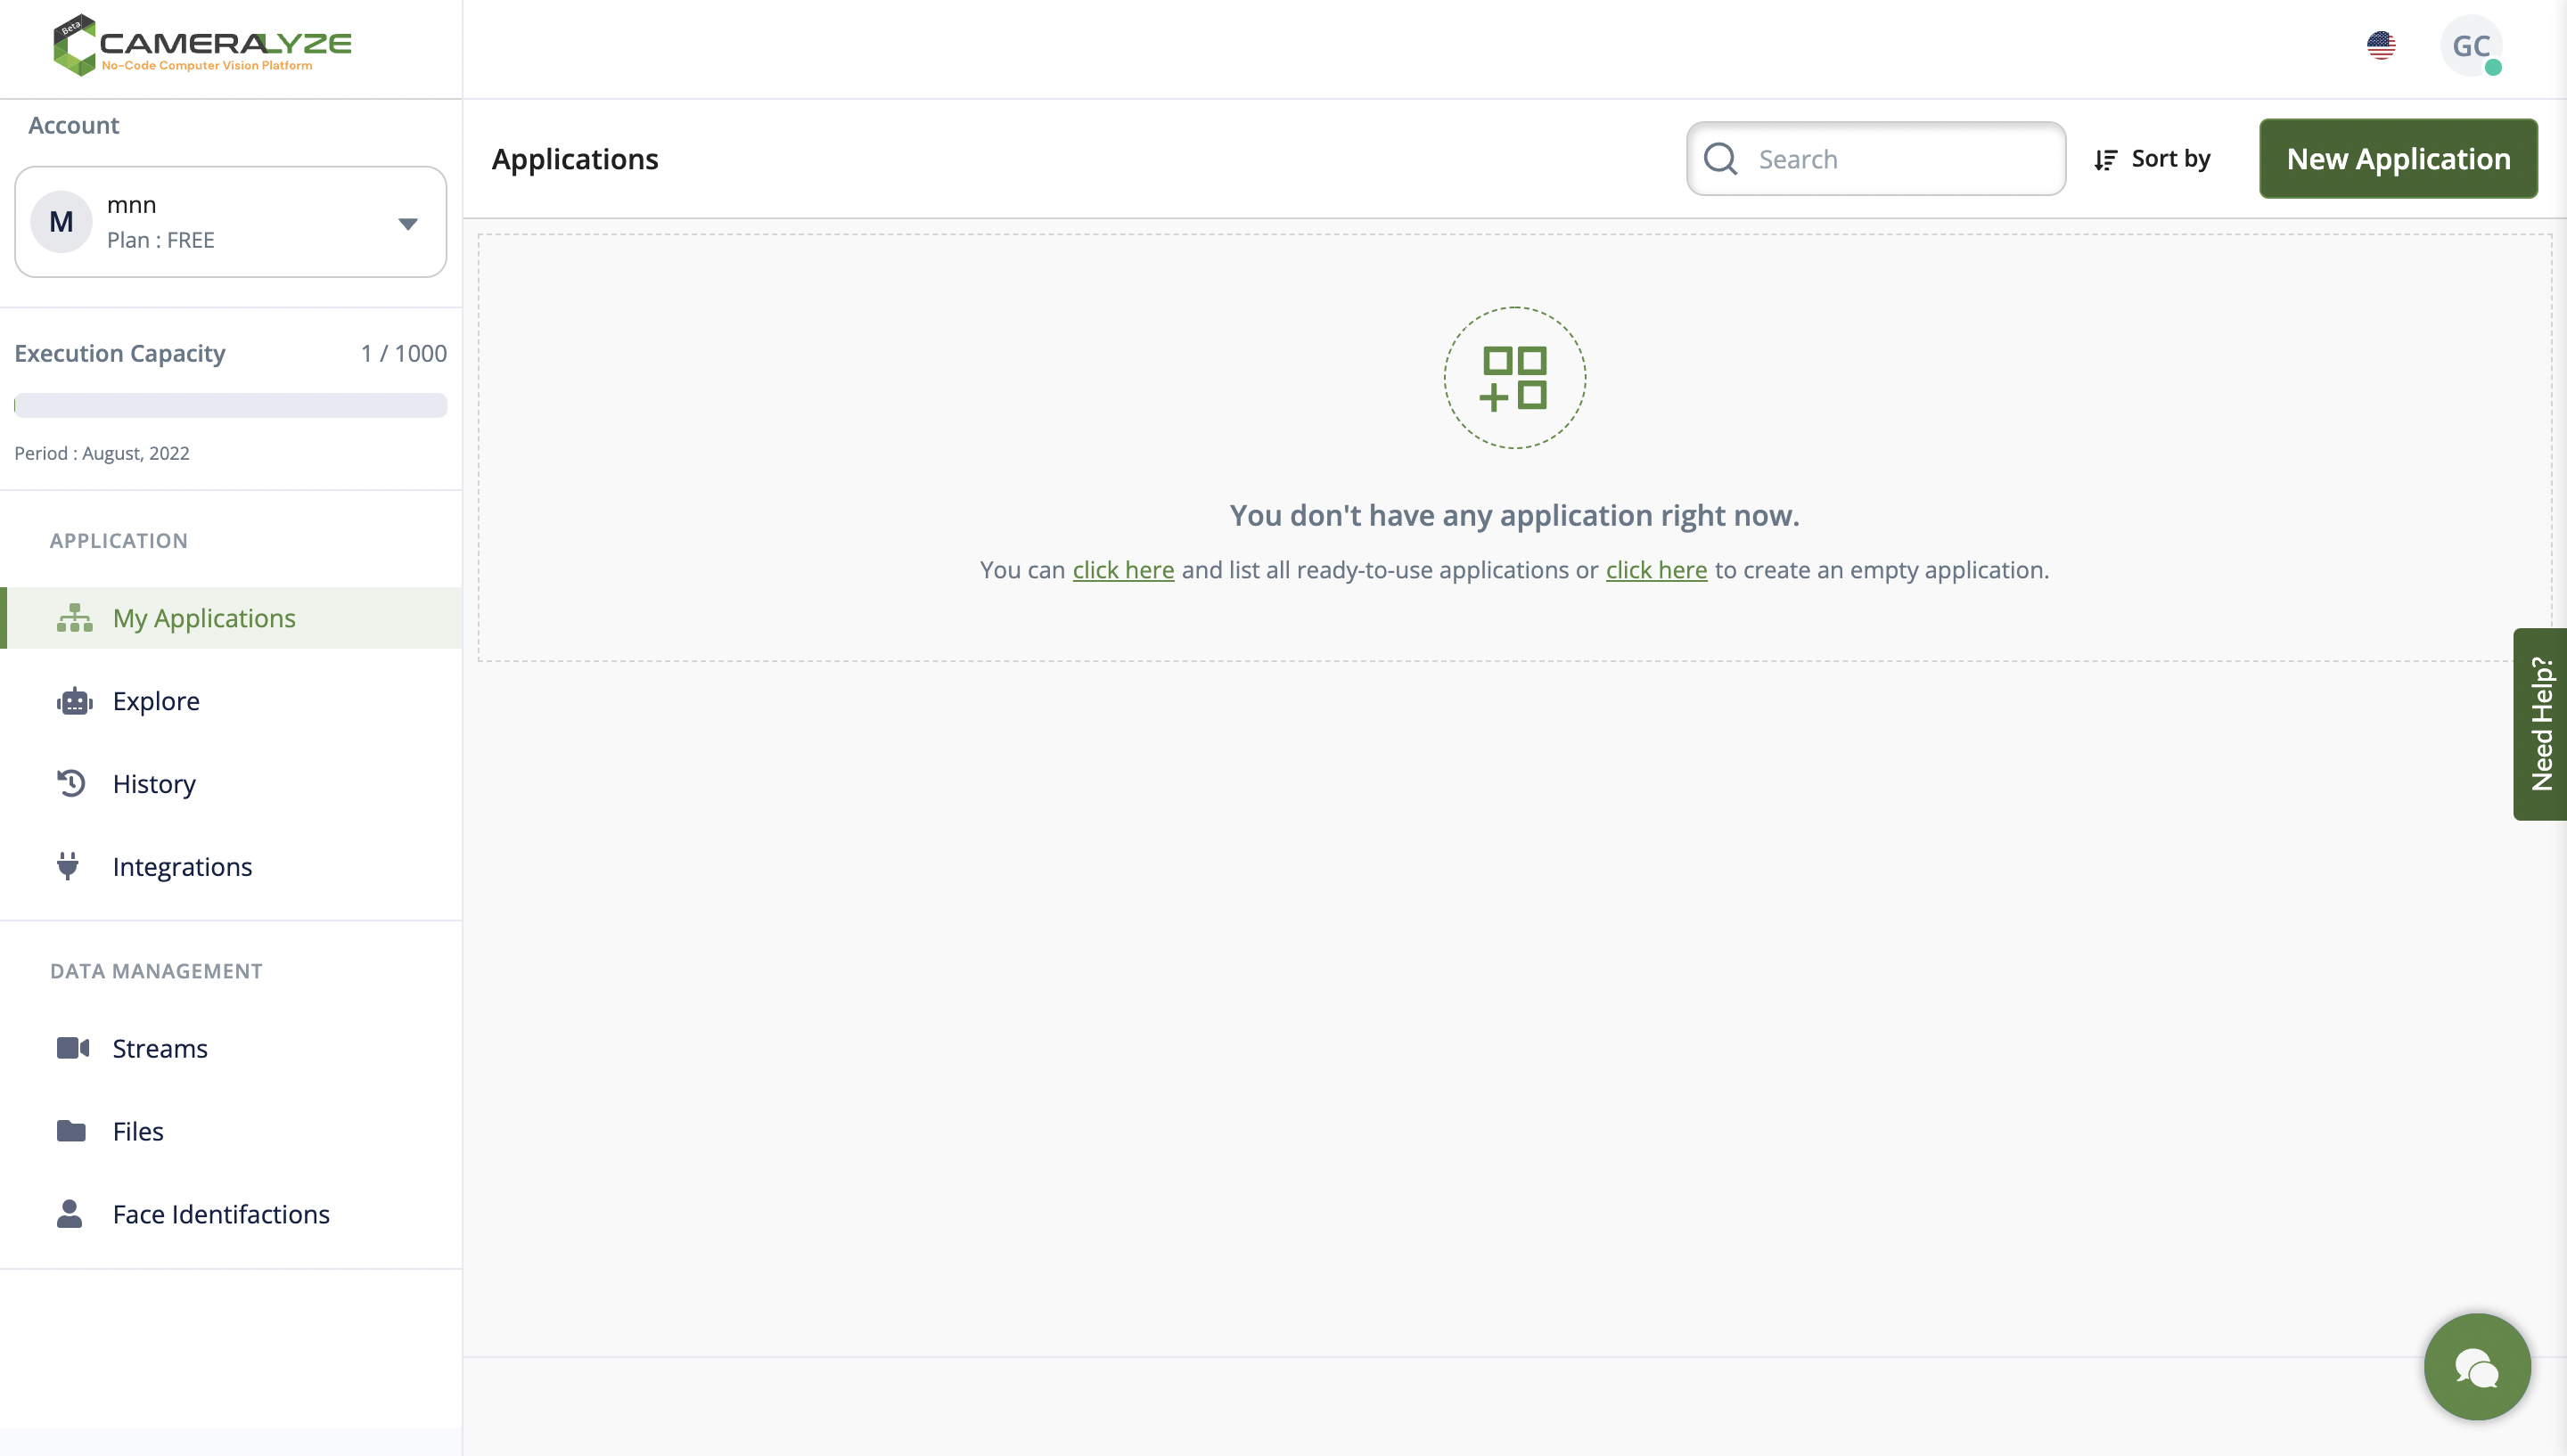
2. There are platform features on the left side of the screen: Applications, Data Management, and Integrations.
3. Click the "My Applications" button. Thanks to the drag-and-drop option, you can easily create your application.
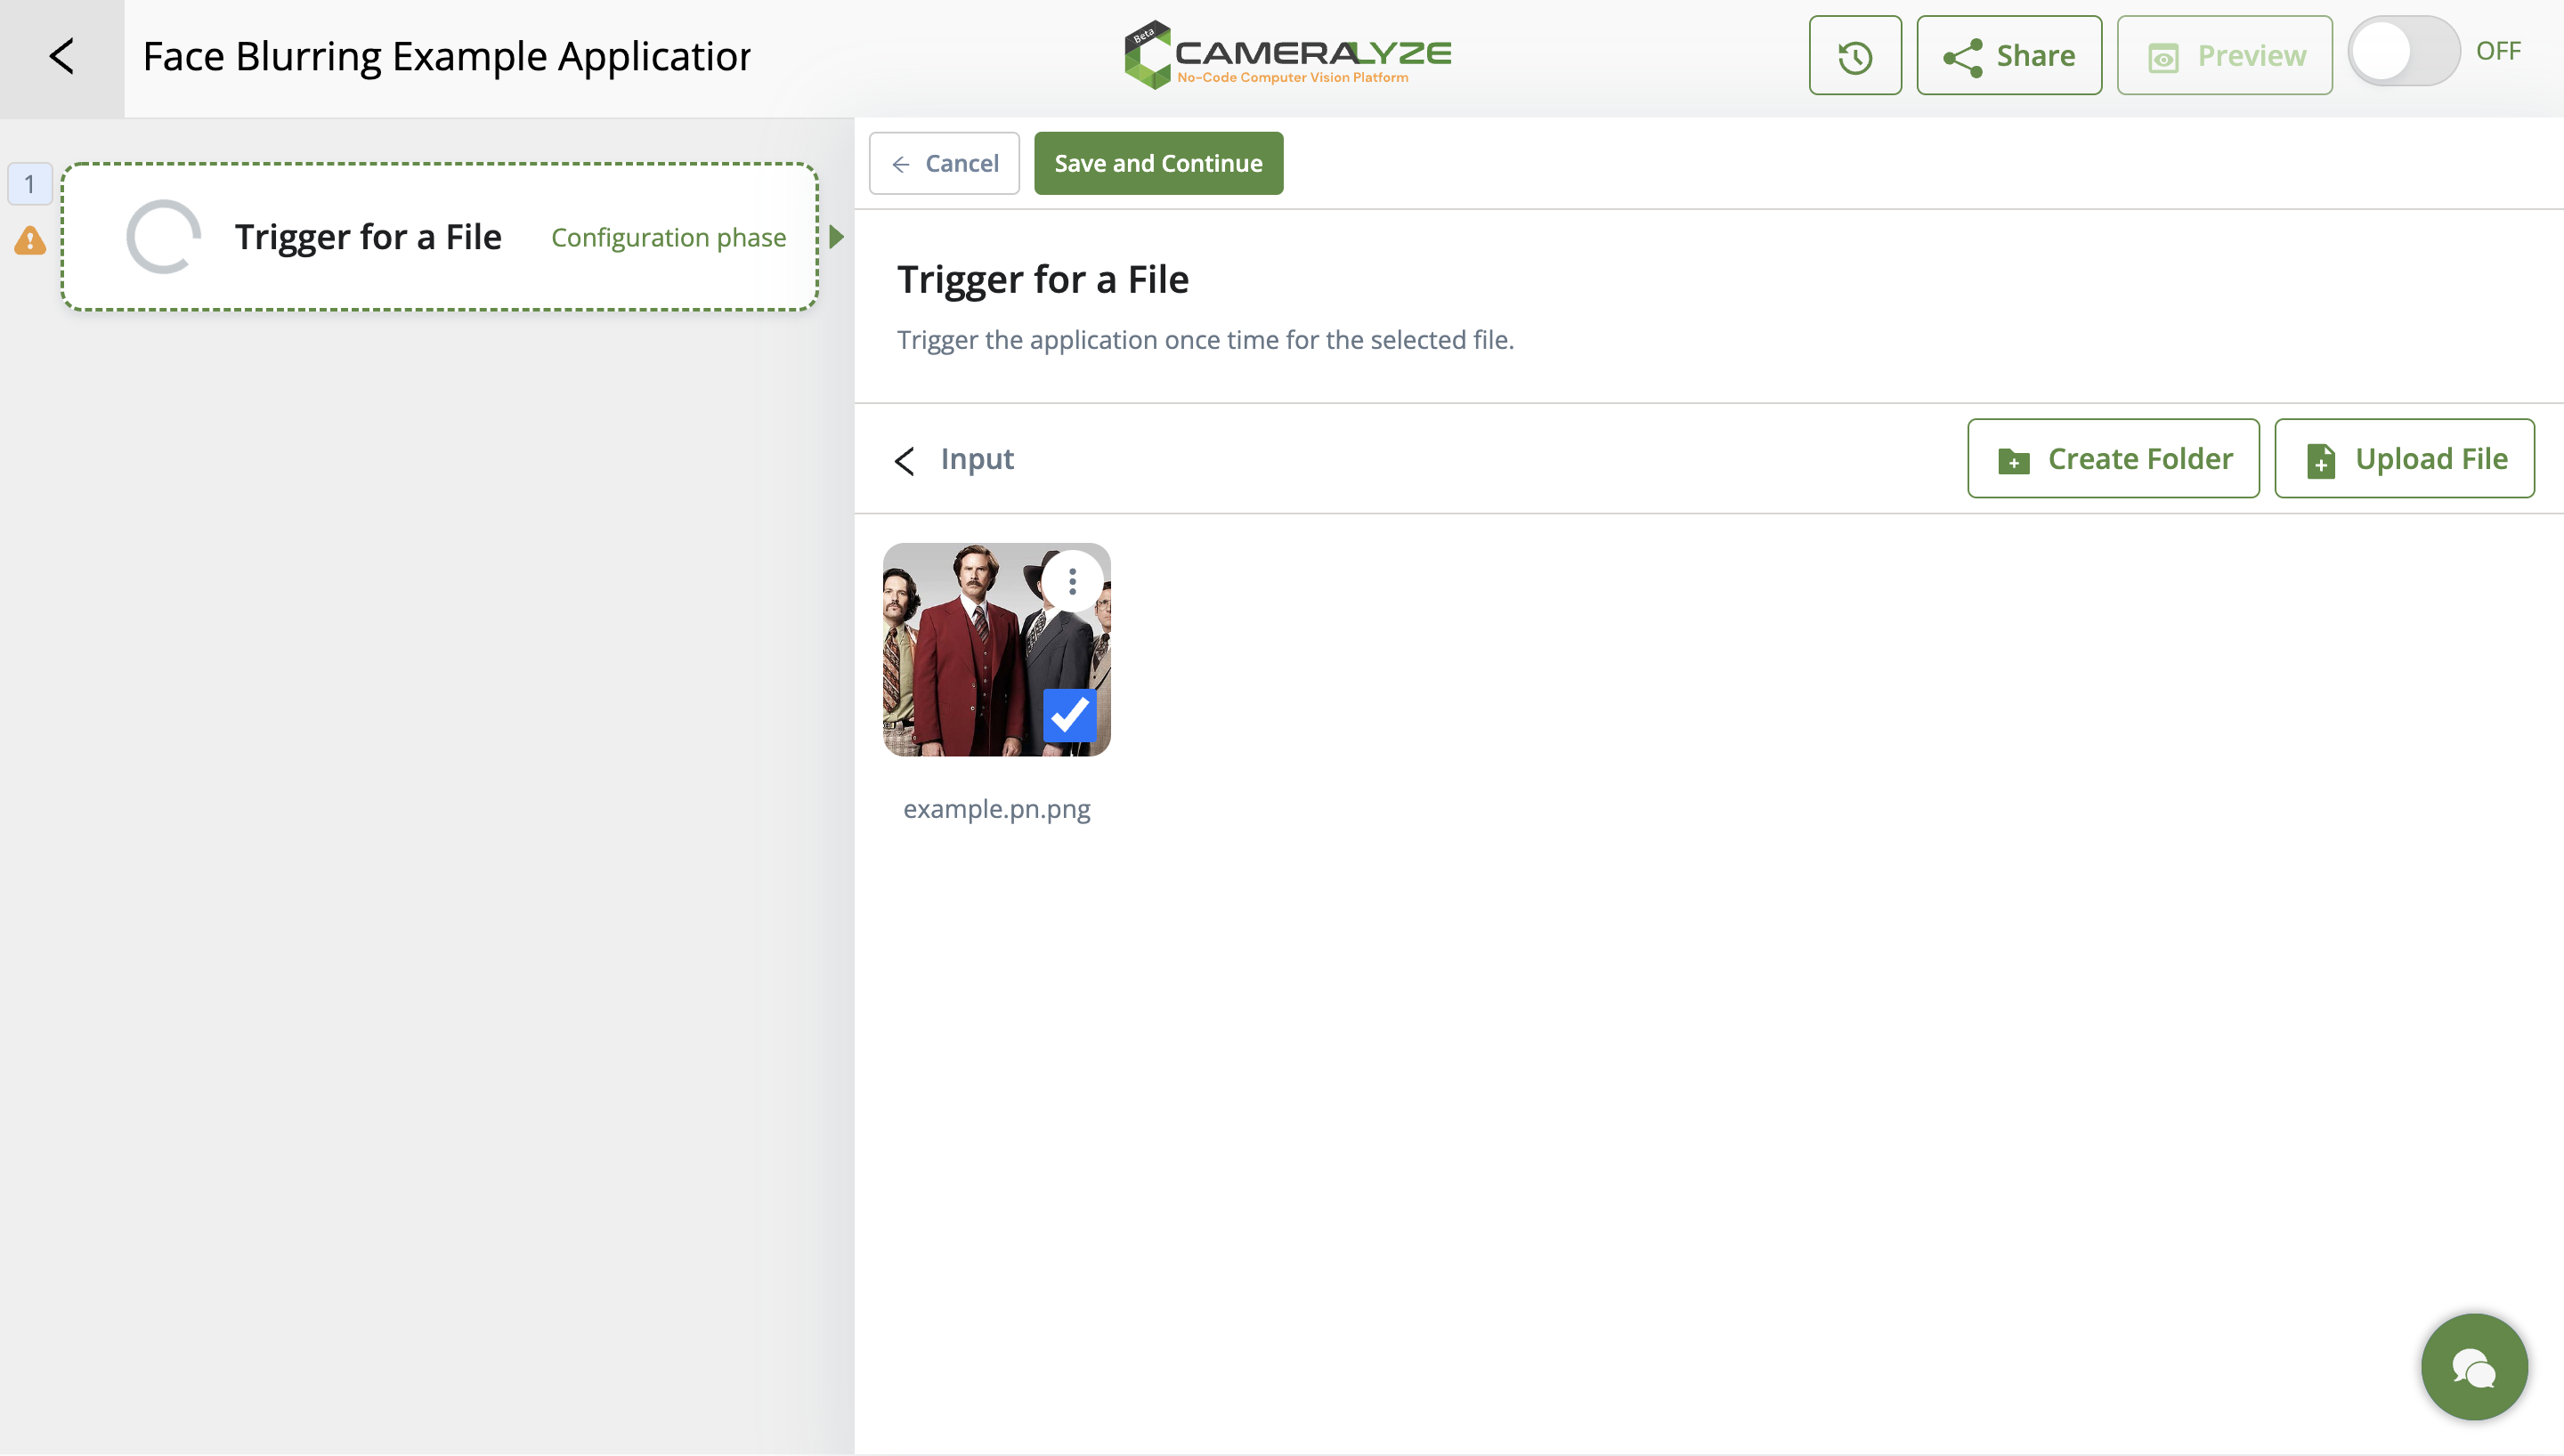
4. As a first step, you should choose a trigger method that will trigger the application. In other words, you should choose the type of resource you will supply data to your application. In this example application, we will use the image in the "Face Blurring" file created for you. If you want to upload a video or an image, you can quickly upload it by selecting the "File" option. You can also trigger the application by entering a request. Now let's select the "Trigger for a file" card to trigger the application and mark the "Face Blurring Example" folder in it. When you enter the "input" file in the folder, you will see the sample image, click on it and click "Save and Continue".
5. The second step of the application is to choose the type of application. In order to create the Face Blur application, it is necessary to detect faces first. For this reason, click on the "Face Detection" card from the application cards. If you want more detailed information about Face Blurring, you can check our informative article by clicking here.
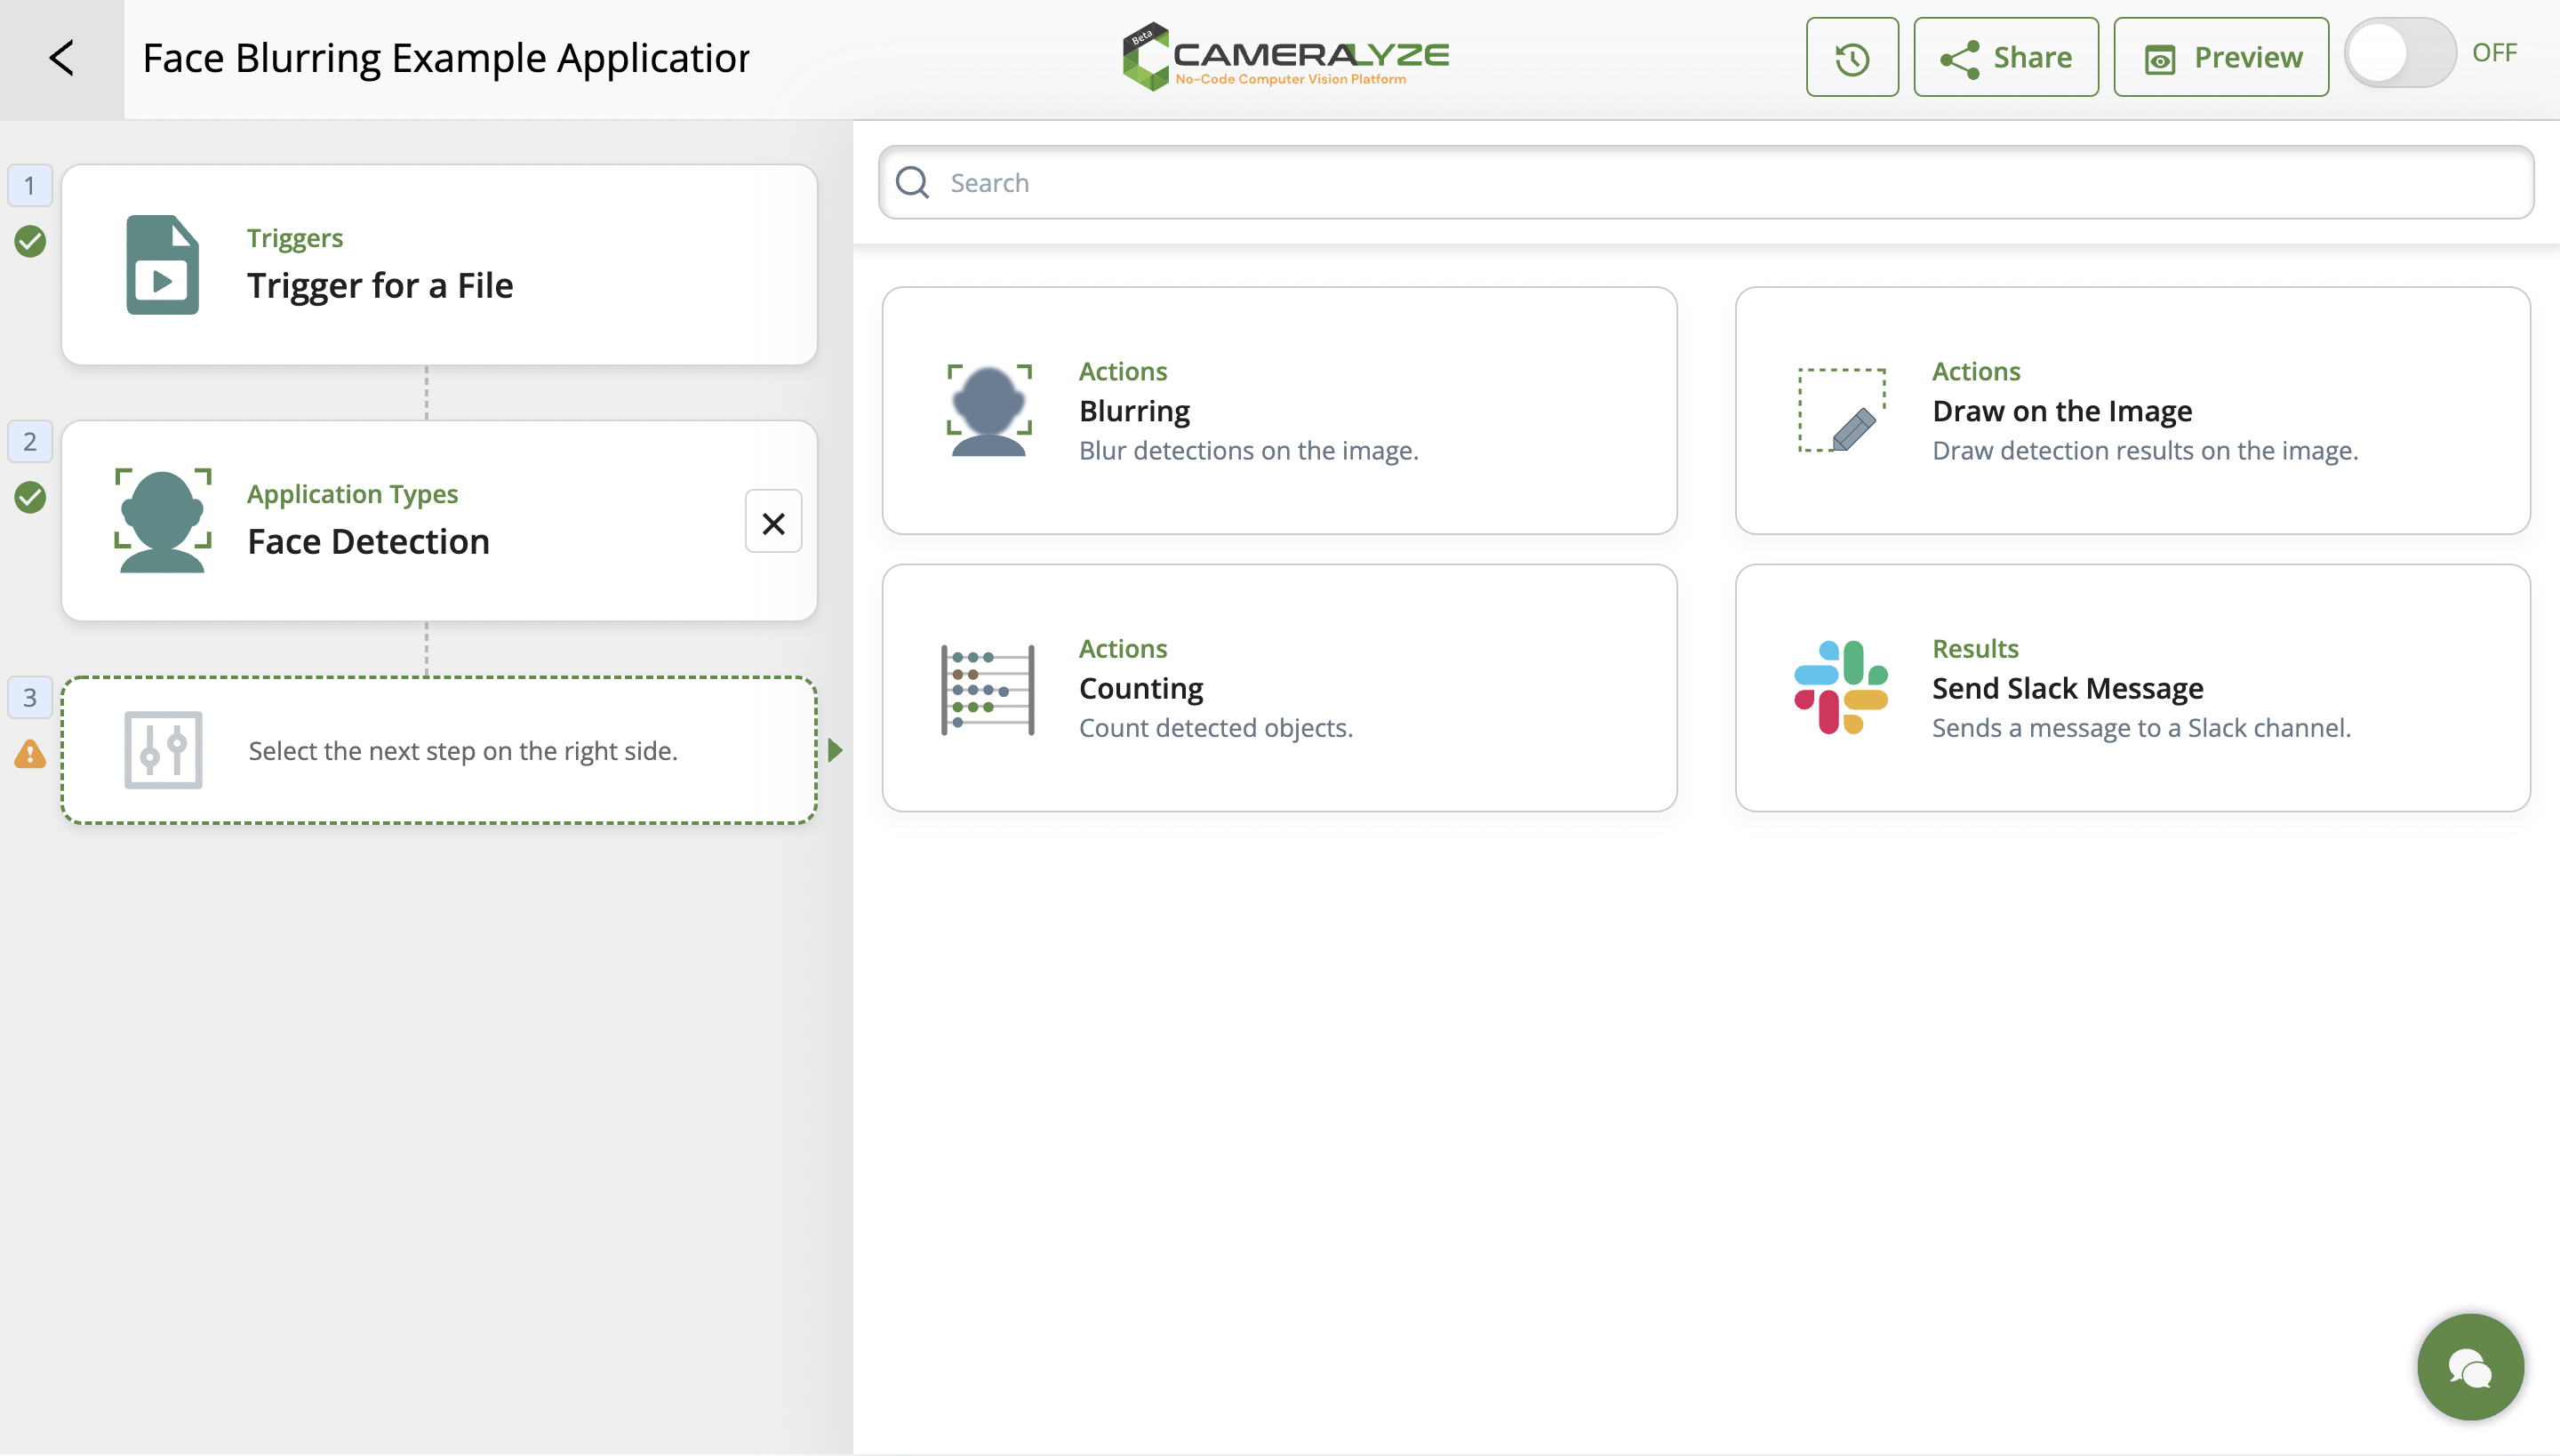
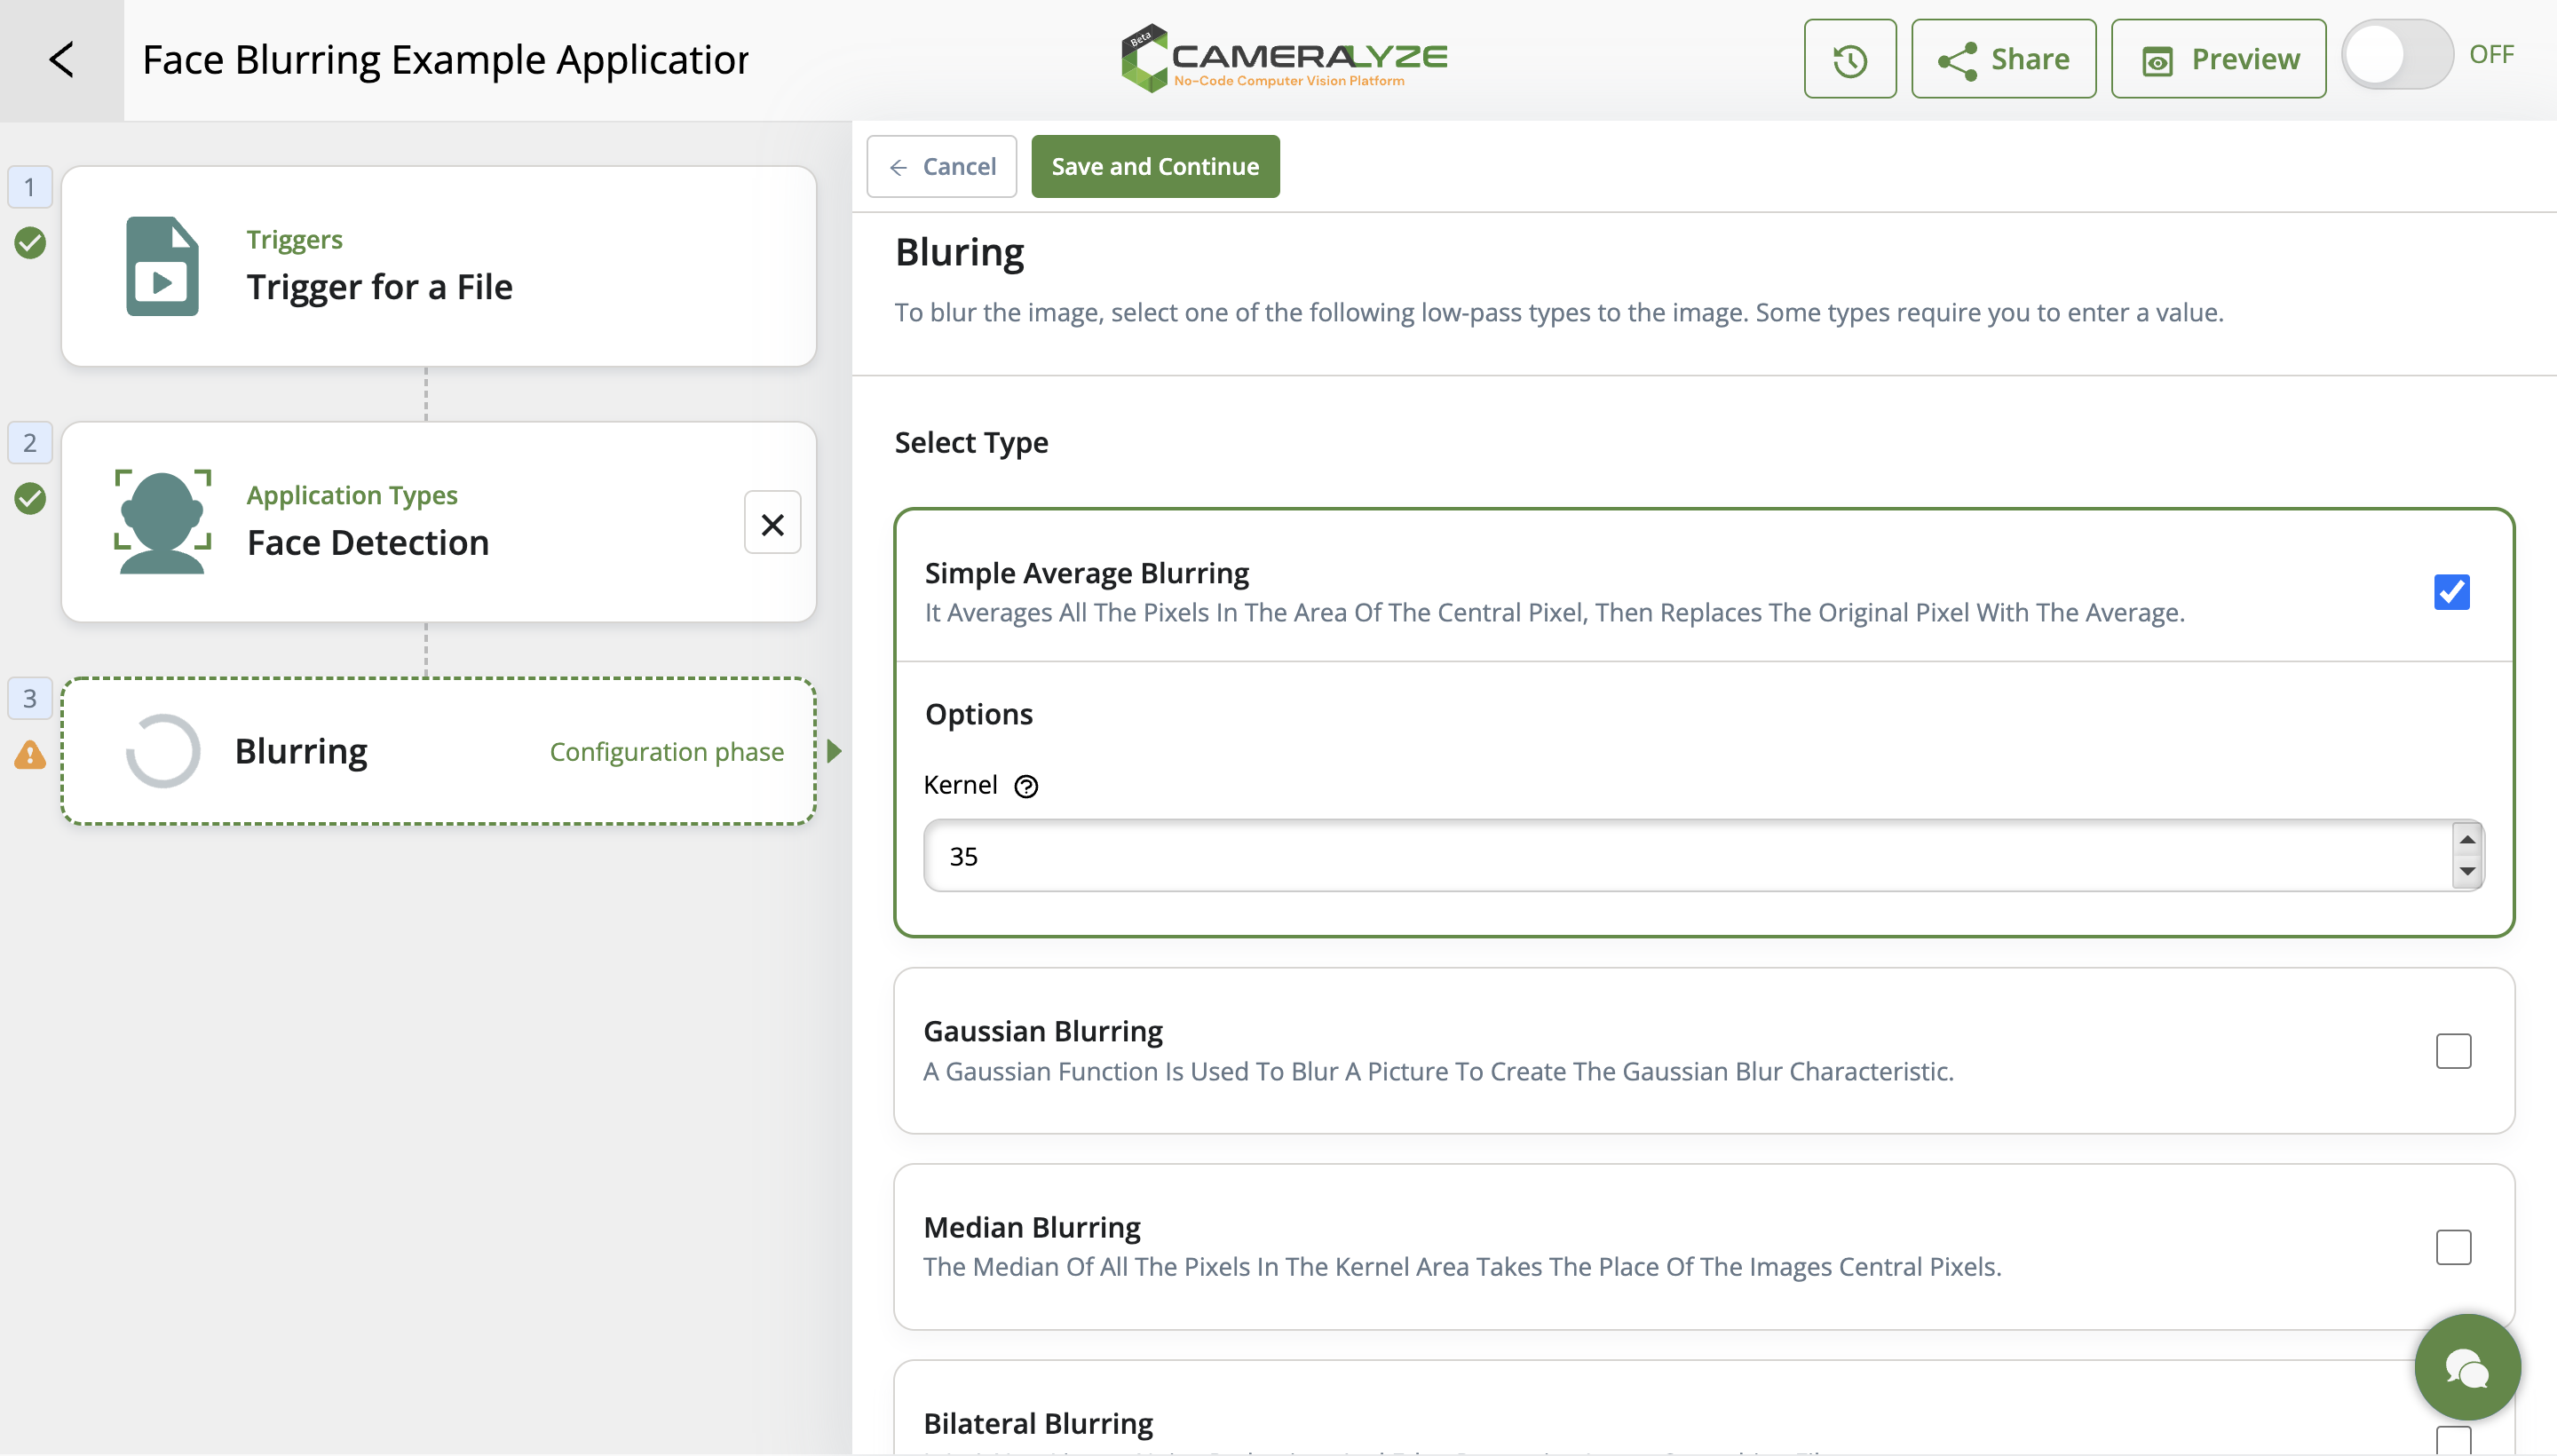
6. In this step, we will choose an action for the application. Of course, because we will create a Face Blurring application, it is to select the blurring action. There are 4 types of blurring in total, these are briefly;
Simple Average Blurring: It Averages All The Pixels In The Area Of The Central Pixel, Then Replaces The Original Pixel With The Average.
Gaussian Blurring: A Gaussian Function Is Used To Blur A Picture To Create The Gaussian Blur Characteristic.
Median Blurring: The Median Of All The Pixels In The Kernel Area Takes The Place Of The Images Central Pixels.
Bilateral Blurring: It Is A Non-Linear, Noise-Reduction, And Edge-Preserving Image Smoothing Filter.
We will use Simple Blurring for this application, but if you want to try it yourself, you can use other types of blurring. When you click on Simple Blurring, you will be asked to enter a Kernel value, we will enter 35 in this value, but you can fill it as you wish.
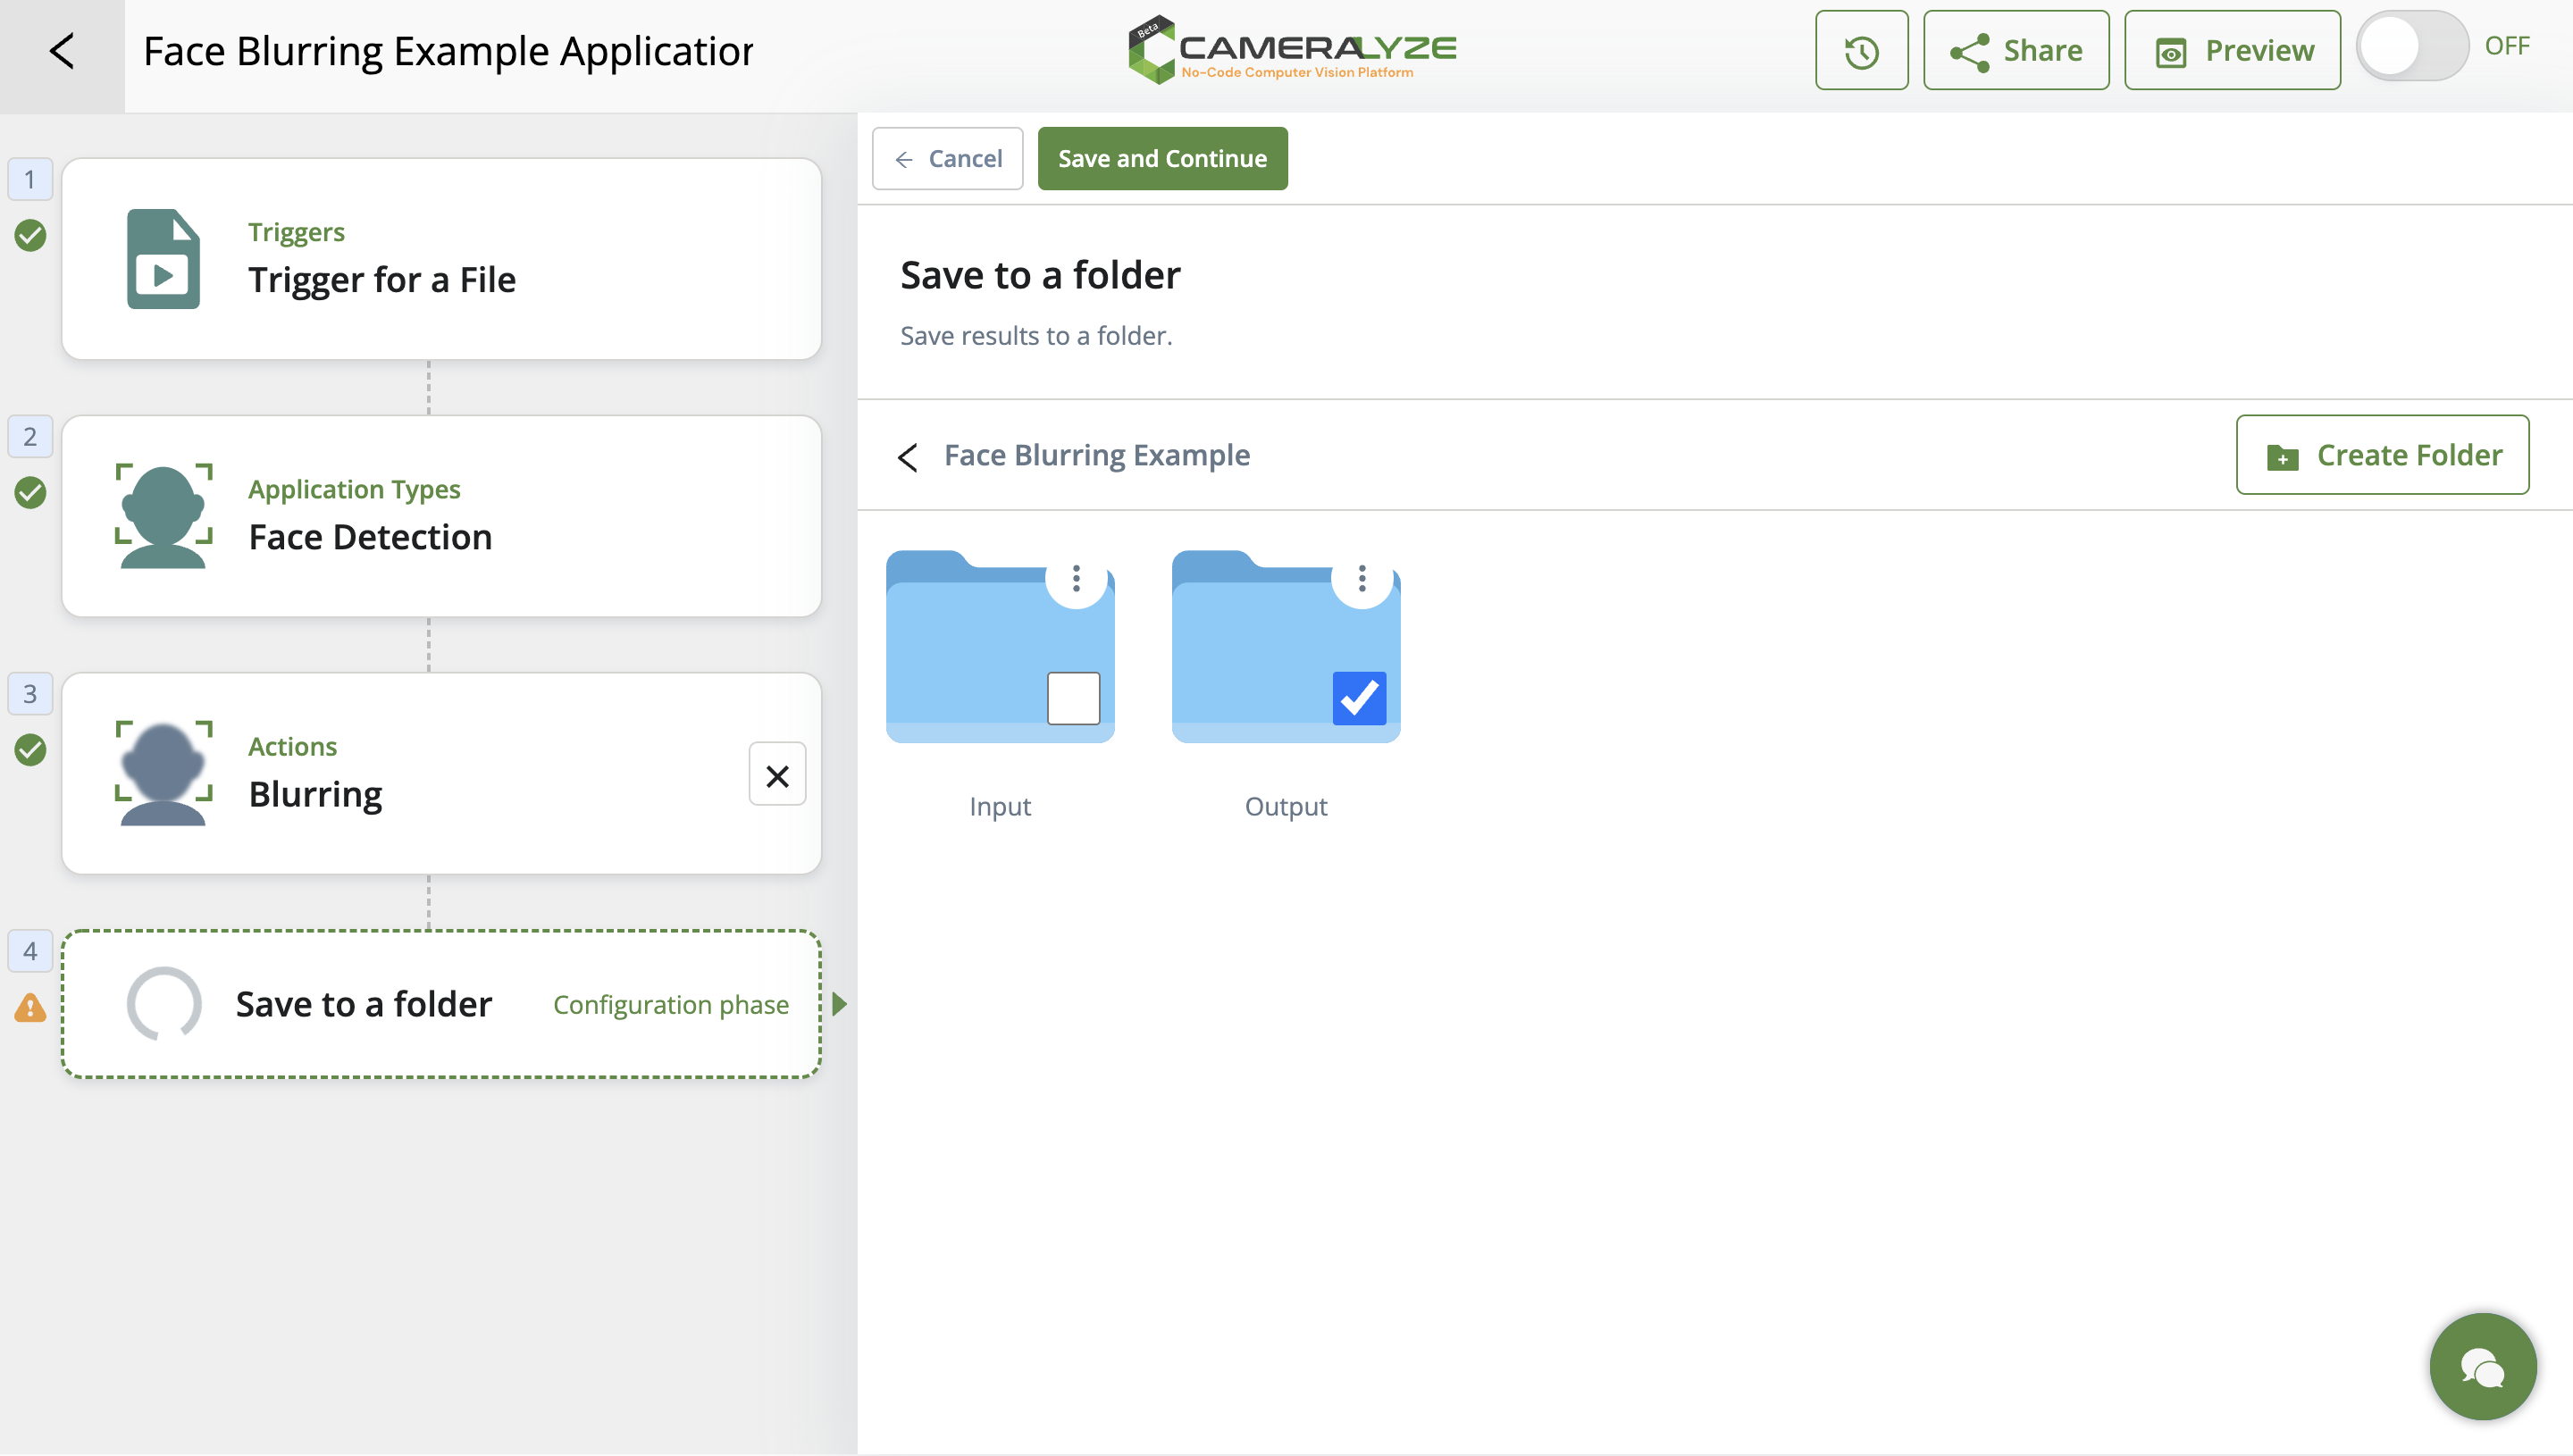
7. The final step is to choose where you want to save the application results. In the meantime, if you wish, you can test whether the application is working properly or not by clicking the "Preview" button in the upper corner. We will choose to save the results of the application in the "Output" folder in the "Face Blurring Example" folder that we have created for you before. If you wish, you can create a folder by staying on the same page without leaving this page.
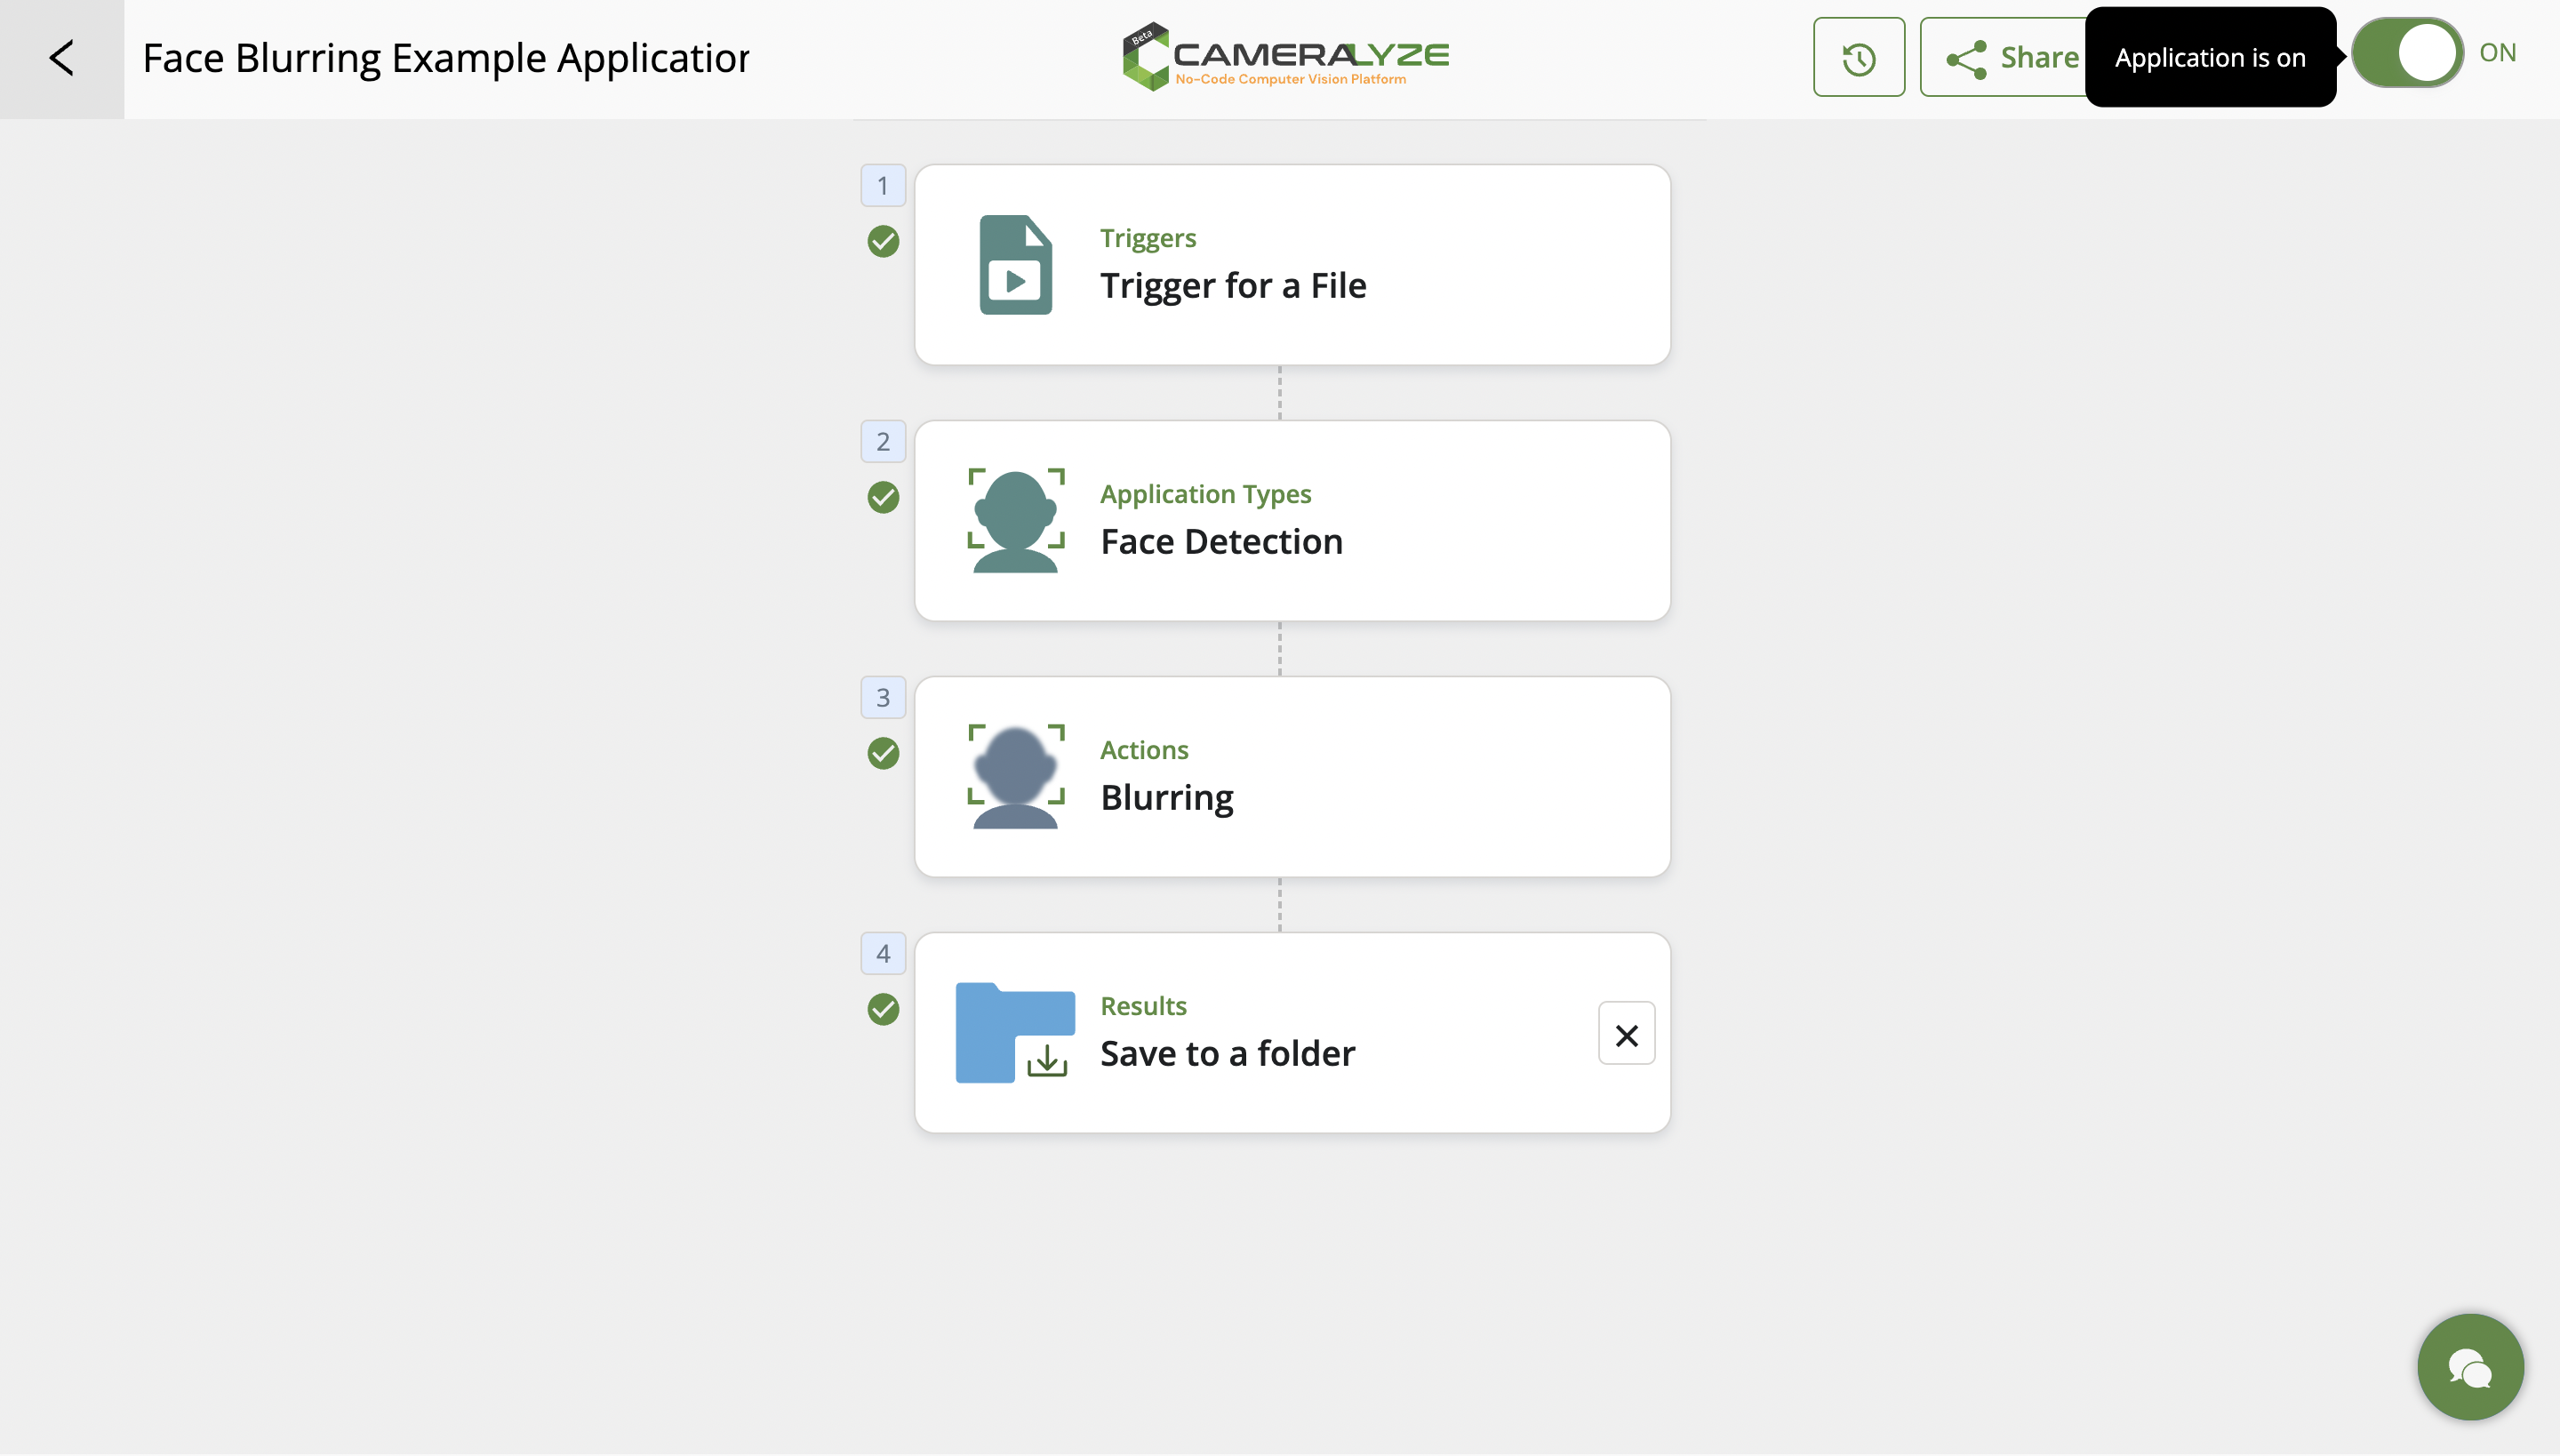
8. That's it! After creating the application, you can make it work from the on-off button in the upper right corner and turn it off whenever you want.
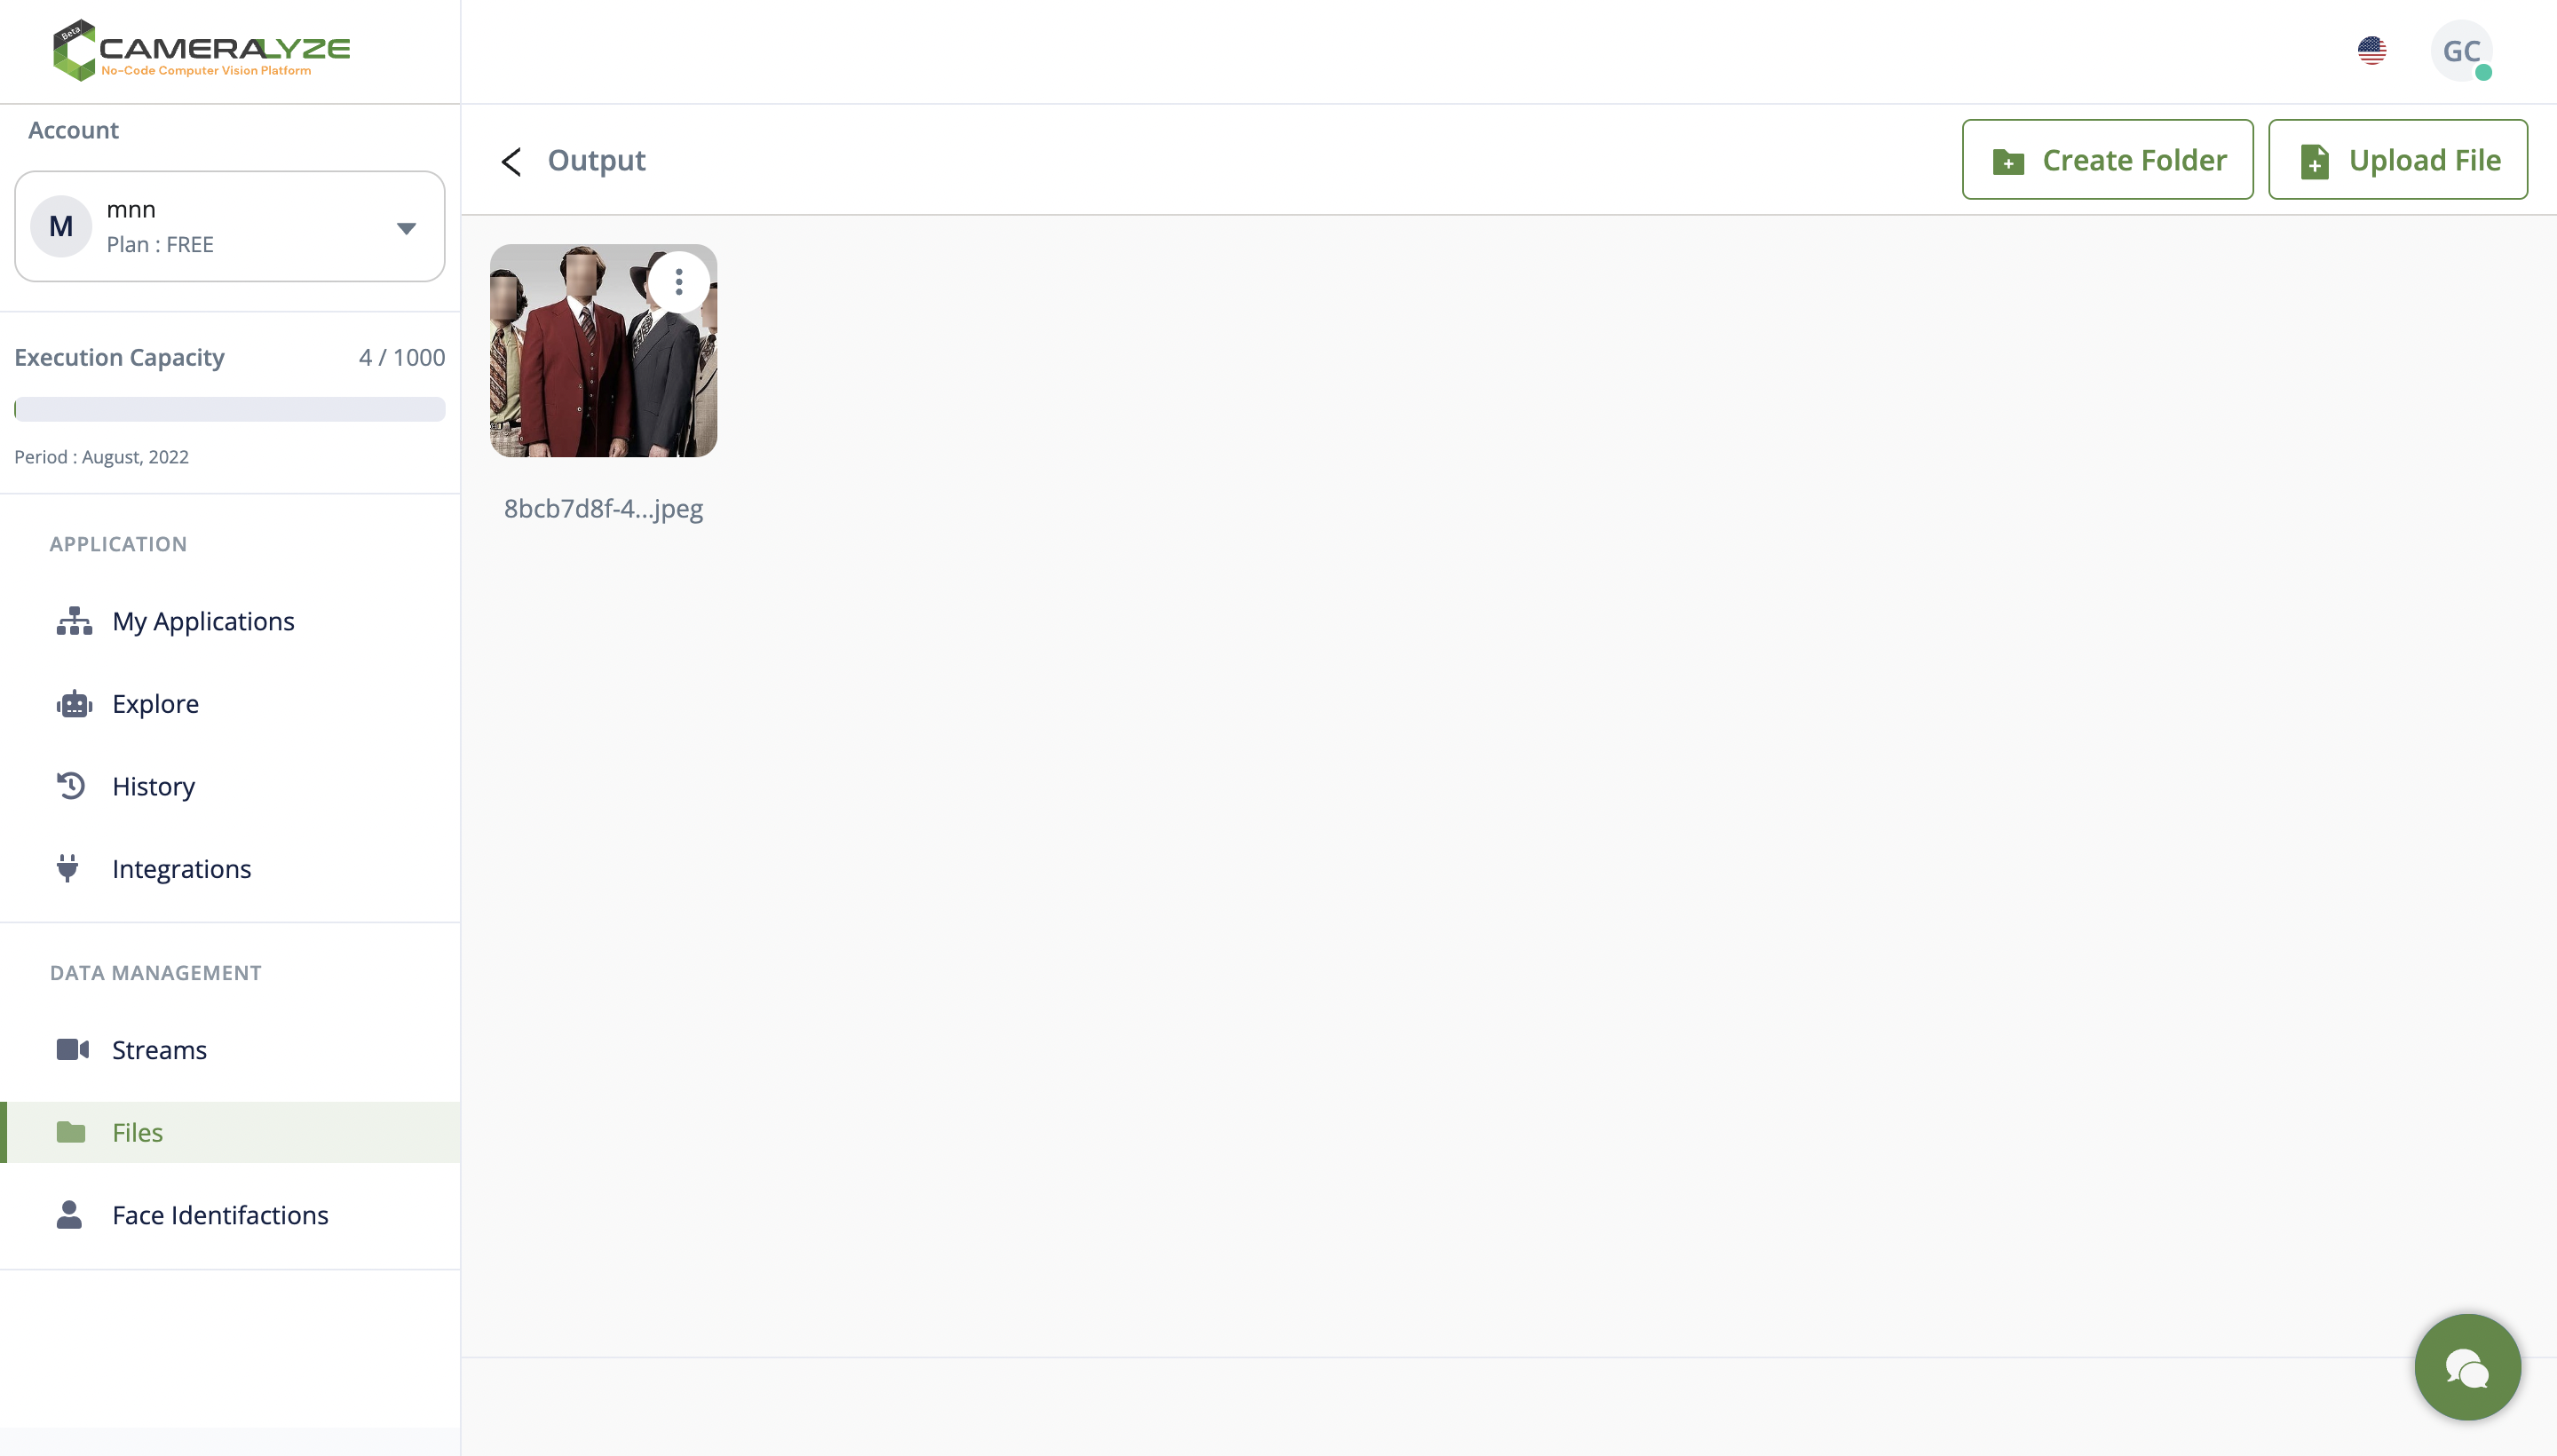
9. You can find the result of the application in the output folder by going to the folder where you choose to save the result, namely the "Face Blurring Example" folder.
Do you want to try directly, not build the application from scratch? You can test the application we have created for you by clicking HERE.
That's how easy it is to create your app with Cameralyze!
.png)