How to Make a Cardless Access Control System with Cameralyze Platform?

How to Make a Cardless Access Control System with Cameralyze Platform
There are many types of access control that businesses can use. Let's build a more effective and faster access control system together, as well as access control systems such as card entry and fingerprint entry. Thanks to the Face Recognition feature on our platform, this system allows entry and exit without needing a card or fingerprint.
Let's build step by step cardless access control system;
You can create your own workflow by clicking this link and following the steps below.
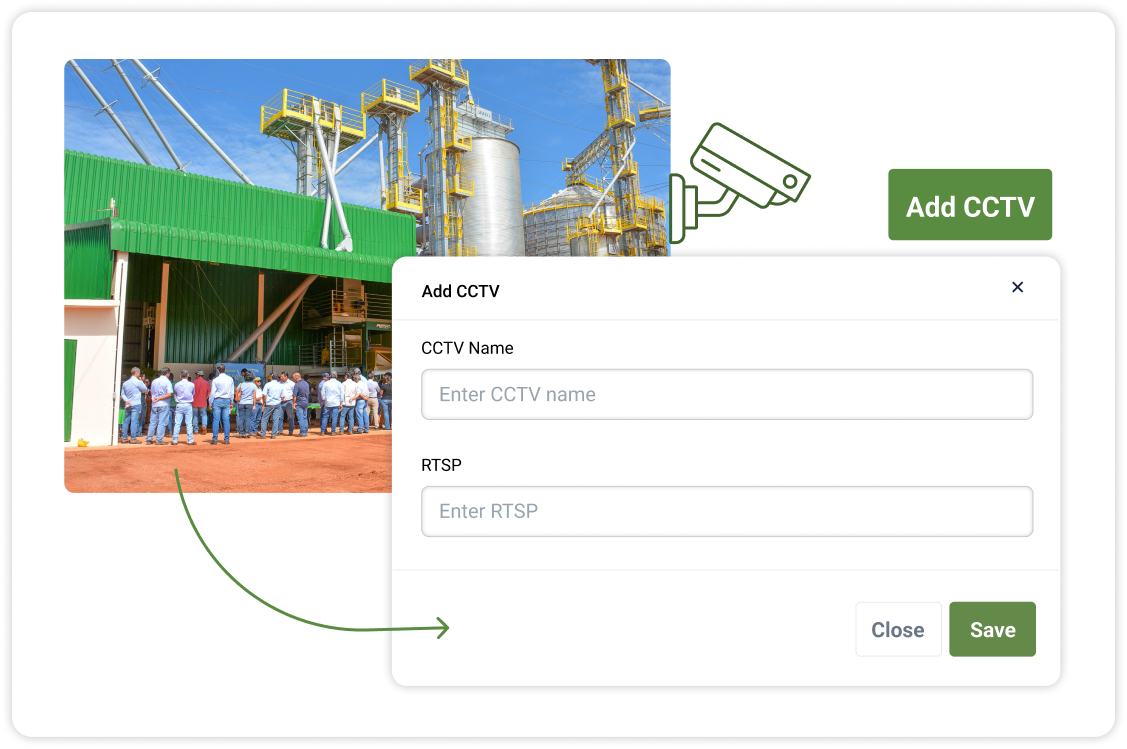
1.Connect Your Camera
As a first step, we will need to create a Job on the platform, which will help us run the workflow as a background task. The first step of the job is where will provide data entry to the platform. Since we want to connect CCTV here, we must select the CCTV component on the platform, there are 2 requested information which are giving your CCTV a name and your cameras RTSP.
2.Add Your Employee Profile
In the second step, we need to introduce the faces that need to be recognized and allowed to pass to the artificial intelligence. For this step, the Face Recognition component on the platform must be selected first. There are also 2 information requested here, and these are the name of the added person and the addition of a visual, then artificial intelligence will automatically recognize and give access to that person.
.png)
3.Choose Where to Send Workflow Results
Workflow results are sent as the name of the person recognized, the time and day of recognition. You can view these results in excel format by saving them as Spreadsheet, or you can save them to any tool by integrating them with third-party applications such as Google Drive, Slack.

4.Test Your Workflowş
Before you run your workflow, you can test the system you have created, and view how it works and the result, by clicking the "Test" button on the right side bar of the platform.

5.Run Your Workflow
After you are sure that the workflow you have built is working correctly, you can switch to the on-off button on the top bar of the platform and start using your workflow and getting results instantly.